Quantcast
Channel: redirects
Viewing all 1228 articles
Browse latest View live

[The Competition for your chance to win a copy of my eBook has now closed. Winners will be notified...

$
0
0


[The Competition for your chance to win a copy of my eBook has now closed. Winners will be notified on the 1st September]

image

transiency asked:
What makeup products would you buy if you only had $50? :)

*Rimmel Match Perfection foundation $6

Not quite as great as my favourite Bobbi Brown Luminous Moisturising Foundation but it is a lovely foundation and I can totally deal with using it. Great price tag, great shade range, great overall foundation.

Maybelline Fit Me Concealer $5

Besides Bobbi Brown this is my go-to concealer. It covers up everything well, not full coverage but super build-able.

Essence Sun Club Large Matte Bronzing powder $5

Benefit Hoola and NARS Laguna are my favourite bronzers and trying to find a good bronzer on a budget can be a touch difficult. There are rave reviews on the NYC Sunny Bronzer but I’m yet to try it so my other favourite option is Essence Sun Club Large Matte Bronzing Powder, it is matte and you get lots of product.

Read More


EBOOK LAUNCH!

$
0
0

What a week!

I’ve been so busy this week (well actually the past 6 months) creating my eBook and I can’t believe it’s finally done, it is so amazing to see the finished product come together. Again, a huge thank you to all my readers your support and encouragement - I couldn’t do any of this without you!

image

98 Makeup Tips & Tricks is a spin off from my quick tip series but  it contains loads more tips & tricks. All the tips are complete with photos to teach you new techniques.

The eBook contains loads of handy tips & tricks to help you get multiple uses out of products, create new looks and perfect the ever so tricky winged eyeliner. I’ll teach you my secrets to contouring, applying false lashes and everything else in-between. Some of the many things the eBook includes:

  • Over 100 pages
  • 98 Makeup Tips/Tutorials
  • How-to photos demonstrating different techniques,
  • Tips & Tricks for the face, eyes and lips,
  • Over 400 Photos in total,
  • Guide on beauty brushes & tools.

image

To celebrate the launch of the eBook there will be a special introductory offer! For the first two weeks for just $7.99 AUD instead of the usual price $9.99! You’ll learn loads of tips, especially on how you can get multiple uses out of one product (saving you money in the long run!) Just visit the eBook page to purchase & download your copy today!
(Promotion starts 30th August 12 Noon AEST and ends 13th September, 12 Noon AEST)
Earlier this month I also held a competition for 6 lucky people to win a copy of the eBook. It was SO hard choosing just 6 winners, the entries were so great that I wish I could give you all a copy! The winners are listed below, if you are a winner congratulations! Make sure to keep an eye on your email as I’ll be sending you an email very soon! In no particular order the winners are:
Hui Rui:
"Unlike many makeup-gurus who only talk about what to apply to achieve a particular look; this blog has explanations on things like different eye shapes (i.e. hooded eyes) & skin undertones. I like how my requests & enquiries are answered, & how the answers are well elaborated & well-thought out(:"
Jessica-Anne:
"I’m an avid fan of Makeup Tips Blog, especially on Instagram and I find you’re always happy to offer advice and sometimes just chat with me. It’s that kind of relationship you have with your followers that makes your blog such a standout - that, and your incredible beauty expertise!"
Zara Penrice:
"I love this blog because I don’t like to waste on products when there are cheaper alternatives, this blog provides unbiased suggestions and advice, I like the tutorials and tips too which you can’t really get in magazines. I trust the author which is the main thing for any recommendation."
Dalton Bird:
"My friends need help with makeup; I go to your blog for tips. Me and my friends love your blog, we try so many things, we call ourselves makeup Princesses and you a queen. I go to your blog everyday to find things that will help me and my friends."
Carol Moran:
"Makeup Tips Blog is helpful because it gives me tips and tricks for applying my makeup; I will be 60 years young on 9/20 and I am still learning. I also find the product reviews very helpful because they save me time and money."
Holly Hill:
"I always know Makeup Tips will have the answer. Evangeline is always lovely if you have a question or comment unlike some other blogs she’s always positive towards her readers."

What brand of eyeliner (pencil/gel) do you recommend to use on your waterline and that doesn't smear? Thanks! :)

$
0
0

Too Faced Primed & Poreless

Water-lining the eyes isn’t really a technique I’m fond of, I find it can be irritating to the eyes and if you use black it can look extremely harsh so I prefer to save it for parties, editorial looks, smoky eyes or when I want my eyes to pack a bit of a punch.

Before you rush out and buy 500 different eyeliners until you find “the one” make sure you are setting around your eye area with translucent powder. Eye makeup can often be attracted to creamy concealers & eye creams so your eyeliner may not be to blame. My favourite setting powders: Essence All About Matt Fixing Compact Powder and Too Faced Primed & Poreless Powder.

It may come as a surprise but I don’t advocate for using waterproof eyeliner on the waterline. This is because it can be very drying plus using a waterproof product on an area that is already wet just isn’t logical! Whilst I love gel eyeliners I don’t use them on the waterline because most are waterproof and I find that using a brush can irritate my eyes further.

image

My all-time favourite eyeliner for the waterline? Rimmel London Soft Kohl Kajal Pencil. It’s one of the very few pencil eyeliners I like; it is creamy, soft, smooth, pigmented yet still long lasting - an absolute winner in my books. They glide onto the eyelids, lash-lines and waterlines with ease and once set I find they don’t budge!

I hope I helped you and if you need anything else feel free to ask.

Make sure to follow Makeup Tips on Instagram, Twitter, Pinterest, Newsletter

If any product you use irritates you discontinue use immediately.

Click here to ask Makeup Tips a question

image

Basic Face Makeup Application

$
0
0

Super confused on where and when to apply concealer? Or don’t even have the slightest clue on where you should apply your illuminator? These basic, quick and easy to follow images & information will have you looking great in a flash and flatter everyone!

Primer & Foundation:

Primer should be applied after moisturising/before foundation. For best results use (clean) fingers, press into the skin. Use the same technique for foundation but allow at least a minute for your primer to absorb. A foundation brush, fingers or buffing brush will produce the best results but the key is to blend. Powder foundation should be applied using a powder buff and any excess should be dusted away with a kabuki brush. Mineral foundations need to be buffed into the skin or you’ll get a cakey finish.

Read More

537) Apply a sticky clear lipgloss and let it sit for a minute or two BEFORE applying lipstick. The stickiness will help the lipstick to last longer and tone down the colour.

Favourites & You may of missed

$
0
0

This week has been a mighty busy one for Makeup Tips & I, after 6 months of hard work and dedication the eBook has finally launched. Due to the launch I haven’t been creating new content anywhere near as much as I would like so I’m trying to slowly get back into the swing of things… In the meantime check out the posts you may have missed:

eBook out now!

Best Eyeliners for the Waterline

Face Makeup for Beginners

Lasting Lipstick Tip

Also; make sure to follow Makeup Tips through Instagram, Twitter, Pinterest, Newsletter to keep up with my latest product loves, hauls and tips!

image

This week I’m loving:

*Glasshouse Triple Scented Candle in Cuba. The mix of Pineapple, Tangerine & Cherry instantly makes me think of a relaxing at a gorgeous summer resort drinking cocktails. There are times when I’ve wanted to grab a spoon and eat the candle as it just smells so delicious!

image

This week I was disappointed with:

Maybelline Color Tattoo Pure Pigments. When I heard Maybelline was launching loose pigments I had to get straight on it! I’m a huge fan of pigments, their intense colour pay off, huge shade range and blend-ability never fails to win me over, it’s a shame Maybelline’s didn’t… I found the colours sheer (not much pigment here, definitely not enough to be called pure!), sparkly, hard to blend and a horrible dry, gritty texture… That being said I did purchase the more colourful shades (Brash Blue and Pink Rebel) and have heard nothing but praise for the neutrals.

*This post contains a product/sample which was sent to me for editorial consideration (products are marked with *) in accordance with my disclosure policy, this does not alter the honesty of this review or the blog, all opinions stated are honest and my own.

538) Eyelash comb dirty and full of mascara? Clean it with a cheap toothbrush!

http://twitter.com/makeuptipsblogg http://instagram.com/makeuptipsblog http://pinterest.com/makeuptip...


scarlettoharaa said: What are some good lipsticks that aren’t drying? Hydrating, moisturising...

$
0
0

scarlettoharaa said: What are some good lipsticks that aren’t drying?

Hydrating, moisturising lipsticks can be hard to come by. Sadly as much as I love a gorgeous matte lipstick I can’t wear them as much as I would like… Being a chronic dry and sensitive lip sufferer means I need to opt for moisturising, hydrating lipstick formulas. The good thing though is over the years I’ve managed to find some lipsticks that are Awesome so I’ve compiled a list of my faves from most expensive to least expensive.

Bite Beauty Luminous Creme Lipstick

Bite Beauty Luminous Cream Lipstick:

So these are a bit more on the expensive side but in my opinion they are worth it, I’m a natural skincare fanatic but when it comes to makeup I find natural brands lack a large selection of different colours, formulas and sometimes quality too but Bite are anything but that. They have loads of shades (although I wish they added more, would love to see some Corals thrown into the bunch) and are creamy, hydrating plus non-irritating. They have a subtle fragrance but I do wish the staying power and pigmentation was a bit better but other than that they are lovely.

MAC Lipstick:

I’m not a big MAC fanatic unlike most people/bloggers but there is no denying that their lipsticks are fantastic (and probably my overall favourite…) There is a huge selection of colours and formulas (stay away from the mattes though, they can be quite drying).The lipsticks are super pigmented, have a subtle vanilla scent and are not only ultra-moisturising but apply with absolute ease.

Essence Lipstick

Essence Lipstick:

Essence is one of my favourite cheaper brands; they have such great quality at even better prices. Their lipsticks are a much more budget friendly and in my opinion quite similar to the creamy, opaque formula that MAC has. Shade range and finishes are a bit limited and scent is a touch strong but other than that they are fantastic!

e.l.f Essential Lipstick:

Another budget friendly alternative and second best to Essence. Not quite as moisturising, long lasting or pigmented but they’re only $1 and for that price the quality is pretty damn good.

[If you love Makeup Tips and this post helps you make sure to vote!]

If you haven’t already done so make sure you follow Makeup Tips on Instagram, Twitter, Pinterest and email!

I hope I helped you and if you need anything else feel free to ask.

If any product you use irritates you discontinue use immediately.

Click here to ask Makeup Tips a question

Essence Me & My Ice Cream Collection Review + Swatches

$
0
0

Make sure to follow Makeup Tips through Instagram, Twitter, Pinterest, Newsletter to keep up with my latest product loves, hauls and tips!

Let’s just start off by saying the Essence Me & My Ice Cream collection smells delicious. If you’ve been reading my blog for a while I’m sure you would know by now that I’m an Essence addict. The gel eyeliner is my holy grail (but sadly discontinued in Australia, although it can still be purchased in other countries) the Stay All Day shadows are magnificent and the lipsticks feel uber comfortable on. When I heard the Essence Me & My Ice Cream collection was launching in Australia I knew I HAD to try it.

Essence Me & My Ice Cream Collection

Essence Me & My Ice Cream Collection

Essence Me & My Ice Cream Baked Eyeshadows 01 Cone Head, 02 Icylicious, 03 Always In My Mint

Essence Me & My Ice Cream Baked Eyeshadow Swatches 01 Cone Head, 02 Icylicious, 03 Always In My Mint

Essence Me & My Ice Cream Baked Eyeshadows from left to right: 01 Cone Head, 02 Icylicious, 03 Always In My Mint ($4.95 AUD)

Essence Eyeshadows have always be fantastic for the price, although I find them a little drier in texture than I usually like there is no denying they are great. The baked shadows remind me very much of the Bourjois Little Round Pot Shadows (which I already love) and they work amazing both wet and dry. The shades in this collection are very Spring appropriate with shimmery pastel hues, they make fantastic highlighters for the inner corners of the eyes and when teamed with mascara make for a great quick, easy and fresh makeup look.

Essence Me & My Ice Cream Shimmer Pearls

Essence Me & My Ice Cream Shimmer Pearls in 01 I-cy u ($5.75 AUD)

Rumor has it these are a dupe for the Guerlain Meteorites Pearls, although I can’t compare them (as much as I’d love to try them I just can’t bare to dish out that much for a shimmer powder!) The Essence Shimmer Pearls gives a gorgeous glow to the highest points of the face and it is oh so subtle meaning you don’t have to worry about looking like a disco ball. The scent is gorgeous and instantly transports me back to my favourite pre-teen Strawberry Lip Smackers.

Essence Me & My Ice Cream Cream Blush

Essence Me & My Ice Cream Cream Blush

Essence Me & My Ice Cream Cream Blush in 01 Ice Bomb ($4.95 AUD)

I’m an absolute blush addict, if there is a new formula out and about I can guarantee you it’s either already on my cheeks or I’m starting at my computer screen lusting for it so I was pleased that Essence included a blush in this collection. Powder blushes often look a little unnatural to me (that’s not to say I don’t like them though!) but gorgeous cream formulas never fail to win me over. The cream blush in this collection really reminds me of the Maybelline Dream Bouncy Blushes (which let’s face it, were a bit of a gimmick) The colour pay off isn’t super pigmented (which is fine by me since I don’t like blushes which have the ability to make me look like a clown) but instead gives a nice coral flush to your cheeks, it is quite a bit frosty so those with less than perfect skin beware!

Essence Me & My Ice Cream Lip Balms

Essence Me & My Ice Cream Lip Balms from top to bottom: 01 Ice, Ice Baby, 02 Icylicious, 03 Ben & Cherries ($3.50 AUD)

The lip balms may have super cute packaging and yummy smelling scents but these failed to WOW me. Whilst I love the swirl effect they have zero pigment and go on clear. They do provide a decent amount of hydration but I found they really accentuated my dry patches.

Essence Me & My Ice Cream Nail Topping Stickers

Essence Me & My Ice Cream Nail Topping Stickers in 01 Rainbow Sprinkles ($3.50 AUD)

The other additions to the collection are also fantastic. The hand wipes are fantastic to pop in your handbag and do an amazing job at removing stubborn makeup swatches, plus they smell good enough to eat. I’ve always been a fan of the caviar nail trend but find it messy & convenient, the nail stickers however allow me to rock the trend without the mess. The range also contains 3 nail polishes in pretty pastel colours.

The Essence Me & My Ice Cream collection is available in select Priceline stores across Australia now. They may or may not be available in other countries so it is best to check your nearest Essence Stockist.

*This post contains a product/sample which was sent to me for editorial consideration in accordance with my disclosure policy. This does not alter the honesty of this review or this blog, all opinions stated are honest and my own

makeup book

How to Apply Red Lipstick

$
0
0

Red lipstick, it’s the most popular beauty look of all time and there is no surprise why; It can make you look & feel like a million bucks, it can give you so much confidence that you feel like you can rule the world so why wouldn’t you want to wear it? It’s an all round colour and can be worn no matter what season, as a gorgeous poppy spring colour or a deep winter shade; In this how-to guide you’ll learn how to apply and rock a kick-ass red lipstick.

Products for Red Lipstick

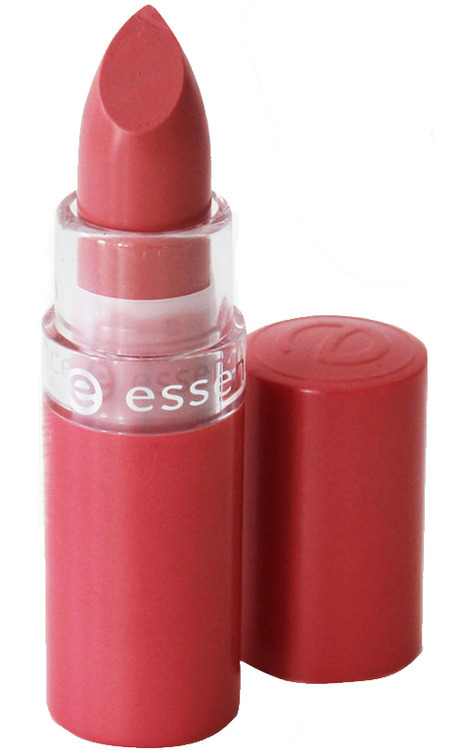
You will need:a lip balm (I like *Neutrogena Naturals Lip Balm) a lip liner that matches your lipstick (I used Maybelline Color Sensational Lip Liner in 50 Red) a red lipstick (my favourite is Maybelline Color Sensational Lipstick in 530 Fatal Red) a lip brush (I love Beau Make by Abbamart Synthetic Lip Brush) a concealer (I used Maybelline Fit Me Concealer) a flat liner brush (I like Beau Make by Abbamart Flat Eye Defining Brush)

How to Apply Red Lipstick

How to Apply Red Lipstick

Step 1: Start by applying a good lip balm and letting it absorb for 10 minutes then blot off any excess with a tissue.

Step 2: Using a lip liner that matches your lipstick apply it all over your lips as a base for your lipstick (it will increase the staying power due to its waxy formula!) Hold the pencil on its side and use light, feathering strokes for the best results.  Finish off by blotting with a tissue.

Step 3: Using a lip brush apply a creamy red lipstick all over the lips, blot an then apply another coat; don’t stress about getting it too perfect.

Step 4: Take some concealer on a flat liner brush around the outline of your lips to further define them & clean up any mistakes, blend with a clean brush.

Step 5: You’re done! You can either leave the lipstick as is for a healthy, creamy finish or apply some gloss just to the center of your lips for a juicy shine. If matte finishes are more your thing blot and whilst holding a tissue over your lips gently dust some translucent powder over them.

Red Lipstick Fears:

"I don’t know how to wear red lipstick!"

Keep the eyes neutral (or opt for some winged liner), use a good foundation to ensure no redness is apparent on the skin, ditch the blush and opt for some bronzer and contour instead.

"I don’t know what colour of red lipstick will suit me!"

If there is a tester available when purchasing a lipstick test it on the pad of your index finger, hold it up to your mouth and smile. You should be able to tell whether you like the colour and if it makes your teeth look whiter you’ve found a winner. Otherwise wine reds with blue tones are flattering on just about everyone. If you have a darker skin-tone cherry reds look fantastic.

"Red lipstick makes my lips look dry!"

Use a good lip balm prior to application and DON’T exfoliate, it can irritate the lips and make them drier in the long run. If lips are extra dry apply some honey to them as a mask for 10 minutes and remove with a warm wash cloth.

"Red lipstick always ends up on my teeth!"

Place your index finger inside your mouth and gently pull it out, any lipstick that would of ended up on your teeth will be on your finger instead.

"Won’t red lipstick make me look like a hooker?"

Nope, not at all! If you are worried keep your brows well groomed, go easy on the eye makeup, don’t use a lot of gloss and ditch the blush.

Make sure to follow Makeup Tips through Instagram, Twitter, Pinterest, Newsletter to keep up with latest product loves, hauls and tips!

*This post contains a product/sample which was sent to me for editorial consideration in accordance with my disclosure policy. This does not alter the honesty of this review or this blog, all opinions stated are honest and my own

makeup book

Bourjois Color Boost Lip Crayon Swatches

$
0
0

Bourjois Color Boost Lip Crayons

Bourjois Color Boost Lip Crayons from left to right:01 Red Sunrise, 02 Fuchsia Libre, 03 Orange Punch, 04 Peach on the Beach.

Bourjois Color Boost Lip Crayons have a gorgeous glossy finish, are super moisturising, don’t dry out or irritate my lips, feel comfortable on and have great pigmentation for lip crayons. Bourjois claim these last up to 10 hours and are waterproof, these do have great staying power but I think calling them waterproof is a bit far fetched and I definitely wouldn’t say they last for 10 hours.The only thing that disappointed me was the fact that product seeps into lip lines and clings onto dry patches of the lips.

Bare Lips

Bourjois Color Boost Lip Crayon Swatches 01 Red Sunrise, 02 Fuchsia Libre, 03 Orange Punch, 04 Peach on the Beach

Bourjois Color Boost Lip Crayon Swatches  top: bare lips. left to right: 01 Red Sunrise, 02 Fuchsia Libre, 03 Orange Punch, 04 Peach on the Beach.

Red Sunrise is a fantastic raspberry shade that is great for those who are a little scared of red lipstick or want an office appropriate red.

Fuchsia Libre is my favourite shade in the range and a beautiful pink which is slightly cool toned (which makes teeth look whiter!)

Orange Punch is a great subtle red-orange shade which would suit almost every skintone.

Peach on the Beach is one of the prettiest coral shades (maybe even the best) I have come across. It has just the right amount of pink and just the right amount of orange to make it the perfect all year round shade.

Make sure to follow Makeup Tips through Instagram, Twitter, Pinterest, Newsletter to keep up with latest product loves, hauls and tips!

*This post contains a product/sample which was sent to me for editorial consideration in accordance with my disclosure policy. This does not alter the honesty of this review or this blog, all opinions stated are honest and my own

makeup book

Favourites & Posts you may have missed

$
0
0

This week I’ve been testing out new products like crazy and also started a new series on the blog: Saturday Swatches… Saturday Swatches are a shorter review style post that will occur once a week on you guessed it: a Saturday! The post contains swatches of one product and a brief review and will be a great way for you to have a quick & easy resource to refer to. Here are the posts you may have missed this week:

eBook out now!

Eyelash Comb Cleaner

Essence Me & My Ice Cream Collection

How to Apply Red Lipstick

Saturday Swatches - Bourjois Color Boost Lip Crayon Swatches

Also; make sure to follow Makeup Tips through Instagram, Twitter, Pinterest, Newsletter to keep up with my latest product loves, hauls and tips!

Soap & Glory Sugar Crush Body Range

This week I’m loving:

*Soap & Glory Sugar Crush Range. I’m a natural/organic skincare fanatic at heart but when I received this collection in the mail and got a whiff of it I was a converted Soap & Glory fan. The products have the most beautiful, amazing scent and thankfully don’t contain too many harsh chemicals. The shower gel is fantastic and produces a good lather without being drying. The body butter is my favourite product in the range; great for my super dry, eczema prone skin and whilst it’s got a very thick formula it absorbs into the skin quickly. The body scrub is a great alternative to my favourite Urban Rituelle Body Scrub which was discontinued and helps a load with my body acne.

Wet N Wild h2o Proof Review

This week I was disappointed with:

Wet N Wild H2O Proof Liquid Liner. I may be a massive Wet N Wild fan but let me just cut straight to the chase - this product is terrible! When I first saw the applicator I was a little worried about the thickness of it but then once I started application I found it great for creating a thick, retro 60’s eyeliner. In the end however it changed into a thick, goopy, sticky mess all over my eyelids which was impossible to remove.

*This post contains a product/sample which was sent to me for editorial consideration (products are marked with *) in accordance with my disclosure policy, this does not alter the honesty of this review or the blog, all opinions stated are honest and my own.

shattereddreamssss said: Hi! I have oily skin and I wanted to find a good concealer for acne...

$
0
0

image

shattereddreamssss said: Hi! I have oily skin and I wanted to find a good concealer for acne scars/blemishes that has really good coverage. I live in the U.S. Also, i heard that Benefit’s Boing concealer(im shade #3) is amazing, but i wanna try a drugstore product.

High end brands have always carried my favourite concealers but that doesn’t mean that you can’t find some fantastic ones at the drugstore… For things such as pimples, acne scars and broken capillaries thick, waxy, stick concealers tend to work best.

Revlon PhotoReady Concealer

This concealer is my favourite for concealing breakouts, acne scars and broken capillaries, it blends well, is affordable and gives fantastic coverage. Only downfall is that the shade range is quite poor and it is a stick concealer meaning you need to apply it with a brush to avoid contamination of the product.

Sonia Kashuk Hidden Agenda Concealer Palette

It’s no surprise this product is an industry favourite, this provides amazing coverage, blends well and contains 3 shades so you can customize them to get your perfect match plus a setting powder. Whilst the shades are a bit too dark for my fair skin and the concealer is a bit expensive for a drugstore product but other than that it is great!

Loreal True Match Super Blendable Crayon Concealer

This is one of the few concealers that can be used on both the under-eye area, pimples, broken capillaries and acne scars which is very unusual. This concealer has a creamy consistency, blends well and has super full coverage. The shade range is great as is the price.

I hope I helped you and if you need anything else feel free to ask.

Make sure to follow Makeup Tips on Instagram, Twitter, Pinterest, Newsletter

If any product you use irritates you discontinue use immediately.

Click here to ask Makeup Tips a question

image

539) Opt for brushes with short handles, they allow you to get closer to the face resulting in more precisce makeup application.


538) Eyelash comb dirty and full of mascara? Clean it with a cheap toothbrush!

Favourites & Posts you may have missed

$
0
0

makeuptips-:

This week I’ve been testing out new products like crazy and also started a new series on the blog: Saturday Swatches… Saturday Swatches are a shorter review style post that will occur once a week on you guessed it: a Saturday! The post contains swatches of one product and a brief review and will be a great way for you to have a quick & easy resource to refer to. Here are the posts you may have missed this week:

eBook out now!

Eyelash Comb Cleaner

Essence Me & My Ice Cream Collection

How to Apply Red Lipstick

Saturday Swatches - Bourjois Color Boost Lip Crayon Swatches

Also; make sure to follow Makeup Tips through Instagram, Twitter, Pinterest, Newsletter to keep up with my latest product loves, hauls and tips!

Read More

makeuptips-: shattereddreamssss said: Hi! I have oily skin and I wanted to find a good concealer...

$
0
0

makeuptips-:

image

shattereddreamssss said: Hi! I have oily skin and I wanted to find a good concealer for acne scars/blemishes that has really good coverage. I live in the U.S. Also, i heard that Benefit’s Boing concealer(im shade #3) is amazing, but i wanna try a drugstore product.

High end brands have always carried my favourite concealers but that doesn’t mean that you can’t find some fantastic ones at the drugstore… For things such as pimples, acne scars and broken capillaries thick, waxy, stick concealers tend to work best.

Revlon PhotoReady Concealer

This concealer is my favourite for concealing breakouts, acne scars and broken capillaries, it blends well, is affordable and gives fantastic coverage. Only downfall is that the shade range is quite poor and it is a stick concealer meaning you need to apply it with a brush to avoid contamination of the product.

Read More

Rimmel Scandal Eyes Retro Glam Collection Review

$
0
0

I have a confession to make; back in the day I was never much of a Rimmel fan, I wasn’t a fan of the foundations, found the eyeshadows were average and the mascaras irritated my eyes like no other but with brand spanking new launches like the Apocalips and Match Perfection Foundation it’s hard for me not to love the brand….

Rimmel Scandal Eyes Retro Glam Mascara, Rimmel Scandal Eyes Thick & Thin Eyeliner

Rimmel Scandal Eyes Retro Glam Mascara and Rimmel Scandal Eyes Thick & Thin Eye Liner

The packaging of the Rimmel Scandal Eyes mascara isn’t my favourite, it does the job but it is bigger and bulkier than a mascara needs to be. The eyeliner is better with a thin, sleek design but the cap doesn’t sit nicely on the end of the pencil meaning you have to chuck it on your vanity and hope you find it later.

As previously mentioned Rimmel mascaras haven’t had a good run with me in the past… Every single one I’ve tried has irritated my eyes making them itchy, red, sore and watery meaning within five minutes I want to reach for the eye makeup remover. Miraculously this mascara did none of that and is actually one of the few mascaras I’ve found that is uber comfortable to wear.

Rimmel Scandal Eyes Thick & Thin Eyeliner Swatches

Rimmel Scandal Eyes Thick & Thin Eye Liner Swatches

The formula of the mascara is spot on. Most Rimmel Mascaras I’ve tried are clumpy and either dry and flaky or wet and goopy, neither of which I like in a mascara. This is the perfect combination between the two, it’s not super dry and doesn’t flake off the lashes but it’s not so wet and goopy that it ends up all over your face and makes your lashes stick together. The formula isn’t waterproof and doesn’t have a waterproof option available which could be an issue for some people. The eyeliner on the other hand I found to be quite watery and IT struggled to produce a jet black line. Rimmel claim the eyeliner is waterproof but my oily eyelids caused it to smudge within 15 minutes.

Rimmel Scandal Eyes Retro Glam Mascara, Rimmel Scandal Eyes Thick & Thin Eyeliner

Rimmel Scandal Eyes Retro Glam Mascara Applicator and Rimmel Scandal Eyes Thick & Thin Eye Liner Applicator

The applicator of the mascara is great and in my opinion contributes a lot to the fantastic results it produces. This is a standard large nylon mascara brush in an hourglass shape which allows you to catch each and every lash. I found the wand too large to use on the lower lashes as it resulted in a bit of clumpiness. As for the eyeliner the applicator may be unique with its two in one idea (an eyeliner that can be used thick or thin) but it just didn’t work well for me. Not only did it start to dry out within a few uses but I found it very difficult to create cat eyes with as it it lacked on the precision front.

The mascara doesn’t provide loads of volume but makes up for it with the amazing length it provides.

Rimmel Scandal Eyes Retro Glam Mascara, Rimmel Scandal Eyes Thick & Thin Eyeliner

Wearing Rimmel Scandal Eyes Retro Glam Mascara and Rimmel Scandal Eyes Thick & Thin Eye Liner

Overall the mascara has become one of my favourites and I’ll definitely be using it for months to come. The eyeliner has a really unique concept but disappointed me so I’ll be sticking to my trusty Physicians Formula one.

The Rimmel London Scandal Eyes Retro Glam Mascara retails for $16.95 and the Rimmel Scandal Eyes Thick & Thin Eyeliner retails for $12.95 at Priceline, Target, Kmart and Big W.  The mascara retails for £6.99, the eyeliner retails £5.49 in the UK at Boots, Superdrug, and Tesco. These products are not yet available in the US but will probably be released in coming months.

If you haven’t already done so make sure you follow Makeup Tips on Instagram, Twitter, Pinterest and Newsletter!

*This post contains a product/sample which was sent to me for editorial consideration in accordance with my disclosure policy. This does not alter the honesty of this review or this blog, all opinions stated are honest and my own

makeup book

ELF Studio Baked Highlighter Swatches

$
0
0

ELF Baked Highlighters Pink Diamonds, Moonlight Pearls, Blush Gems

ELF Studio Baked Highlighters from left to right: Pink Diamonds, Moonlight Pearls, Blush Gems

Highlighters are one of my favourite products but I find I usually tend to steer away from powder formulas as they often look dry and chalky and opt for liquids and creams instead. I was a huge fan of the ELF Baked range when it first launched and when I saw they came out with highlighters I knew I needed them that instant. The ELF Studio Baked Highlighters have a gorgeous pigmentation and a beautiful velvety texture that applies and blends to the skin with ease. These do not appear chalky, unnatural or cakey on the skin and stay put all day. They are budget friendly and can be used wet as an eyeshadow for a beautiful runway sheen. I cannot find one single thing to fault about these they have an amazing shade range, are budget friendly and look amazing on the skin!

ELF Baked Highlighter Swatches Pink Diamonds, Moonlight Pearls, Blush Gems

ELF Studio Baked Highlighter Swatchesfrom left to right:Pink Diamonds, Moonlight Pearls, Blush Gems

Pink Diamonds is a pretty pink based shade and looks amazing on lighter skin-tones

Moonlight Pearls is my favourite shade out of the range, it is a beautiful warm champagne colour that is universally flattering on all skin-tones

Blush Gems is a warm bronze shade that is perfect for giving that sunkissed glow and is a beautiful shade for medium and dark skin-tones.

Make sure to follow Makeup Tips through Instagram, Twitter, Pinterest, Newsletter to keep up with latest product loves, hauls and tips!

makeup book

Viewing all 1228 articles
Browse latest View live